By Dan Limmer
One of the things I have always done is integrate some sort of EMS skill during the first session of class. This vital signs learning exercise is a good one for new EMT students. It gets them engaged and thinking right away. Students love to do, so whether you use this exercise on the first session of class or as filler on a day you finish early, the activity time will be meaningful for them.
This dynamic learning exercise lets students start with some preliminary, safe and easy vital signs—but also starts the critical thinking and evaluation process necessary for adequate vital signs. It takes about an hour and involves minimal teaching and introduction.
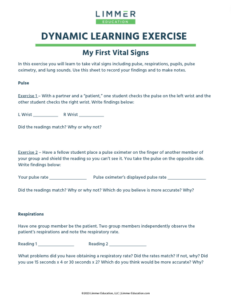
My First Vital Signs: EMT Student Learning Exercise
Click to download the exercise
There is a wide amount of variation on how you can do this exercise. It depends on the number of students, the number of staff members available, equipment available, etc. Lab instructors are helpful but not necessary, depending on your class size.
Start by pairing up your students in groups of 3-5. Assure each group has:
- a penlight
- at least 2 stethoscopes
- a pulse oximeter
- a watch (or clock on the wall with second hand)
Provide each student a copy of this exercise (page 4-6 in the download). They will record their findings there. Alternatively, break students into groups and have one “station” for each of the vital signs. Note that some students will take less time than others.
Your job, and the job of any assistant instructors, is to facilitate. Be sure that the procedures are being done correctly, but don’t forget that sometimes students need to figure things out for themselves to provide valuable learning.
Facilitation Points for Each Vital Sign
Remember: There is no “about” in vital signs.
 Pulse:
This exercise should help students locate a radial pulse and take accurate vital signs. It adds the concept of having students compare their pulse rate findings and to compare it against the pulse oximeter. This will promote accuracy. Check student’s finger placement in the proper position and let them know that it takes a few times counting and watching the clock to get it right. That is why we practice.
Respirations:
Counting respirations is harder than it looks. From staring at the chest to not letting the patient know you are counting (to make sure it is accurate) to watching subtle rise and fall and your watch at the same time, this may be one of the more challenging—or at least labor-intensive vital signs. Share tips and tricks you may have but make sure students practice. No lecturing!
Lung Sounds:
This part of the class is to start listening to lung sounds. Most students will have normal sounds although the occasional asthmatic wheeze may sneak in. Students are asked to listen to three areas of the chest (remember bases are auscultated in the back only). If possible, without compromising modesty or dignity, the stethoscope should be placed both over clothes and directly on skin to compare the difference.
Pupils:
Consider making the room light and dark (if you can) to show how pupils will differ in different light. Also coach the student to not shine the light in the eye for too long because it will cause discomfort.
Happy teaching! If you use this exercise in your class, we’d love to hear how it goes.

Vital Sign Poster Set
This two-page poster series displays detailed information on the six major vital signs (pulse, respirations, BP, pupils, skin, and oxygen saturation). Place these posters on the wall where your students practice, and they’ll have a constant reminder of how to do it right. Purchase here.